Connecting Arcade Buttons to Raspberry Pi GPIO Pins
/The simplest and least expensive path is purchasing pre-made wires. Doing this saves you from having to crimp half the connections as well as needing to buy wire of each color by the spool. This guide covers trimming the wires to the length we need and adding a connector for the RPi's GPIO pins.
Materials
Select the appropriate size for your arcade button terminals, either 0.187-inch or 0.250-inch:
- Arcade wires - Paradise Arcade wires with 0.187" connector | with 0.250" Connector
- Ground daisy chain - Paradise Arcade 0.187" size | with 0.250" connectors
- Crimps - Female pin connector 2.54mm
The 1x1 housings are used for each individual button wire, and the 1x4 for the joystick wires:
- Crimp Housing - Connector housing 1x1 |
Mounting the Raspberry Pi to a piece of wood can be accomplished with our 3D printed bracket:
- Printed from us - Raspberry Pi mount w/ screws
- DIY 3D printer file - RPi mount
Tools

The more expensive ratcheting models create more consistent crimps but are harder to wield, especially for small wires. They also require the correct die which could cost more on top of the tool.
Using a fancy crimper without understanding how to make a quality crimp won't save you time in the long run. Moreover, wire crimpers get very pricey and vary so widely in quality that it's not worth investing in a dedicated crimping tool. Unless you're doing hundreds of crimps, a simple set of crimpers will do a faster and better job for this application. Here's two alternatives that I'd suggest instead. All the crimping below was done with the Mighty Crimper.
- Crimpers - Mighty Crimper
If you don't have wire strippers, then the All-in-one Tekton will save space in your toolbox as the crimper is built-in:
- Wire strippers - All-in-one Tekton
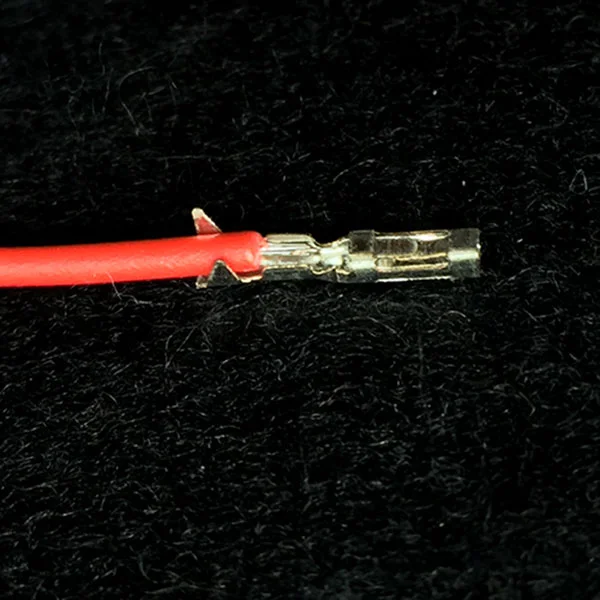
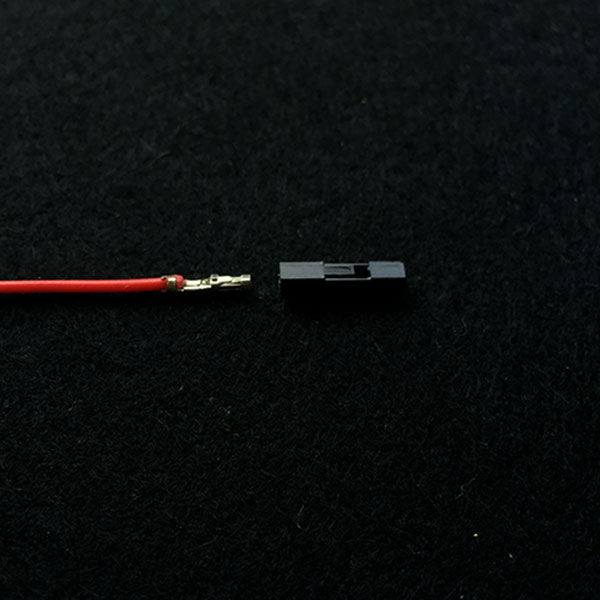
Making the wires
Click the images below and hover for step-by-step descriptions:


Connecting the buttons to the Raspberry Pi
One wire from each button needs to go to a GPIO pin. They're colored green in the diagram below.


Download the DIY frame instructions here or have a frame shipped to you here. A custom bracket was 3D printed for the Raspberry Pi. The bracket can be used on MDF and dense woods to quickly mount your Raspberry Pi.
Make note of "button --> pin number" for each button so we can configure the keypresses later.
Connecting ground
Crimping a custom daisy chained ground harness would help to make everything cleaner. Anomaly Arcade Sticks has a great write-up on how to do this.
Now that the Raspberry Pi can sense each button we need to give it a signal to sense. Daisy chain the ground wire between all the buttons by connecting the unconnected terminals together. Connect the end of the ground chain to one of the Raspberry Pi's GPIO ground pins. They're labeled in black in the diagram to the right. Now, when an arcade button is pressed, a GPIO pin will be connected to ground thereby changing the pin state from HIGH to LOW, which will eventually be translated into a "key press" the software recognizes.
Once all the buttons are connected to one ground and one GPIO pin, we're done with the electronics. After some wire management, close it up.
Configuring the buttons
UPDATED 7/28/2016: A more in-depth blog post on the process can be found here.
In order for the GPIO-connected arcade buttons to trigger keyboard keypresses that our games can recognize, we need some custom software to map each button to a key. Adafruit's open-source utility takes care of the magic needed to make this happen. Depending on your button configuration, you'll most likely need to change or add mappings. Again, Adafruit provides a fantastic tutorial on this process. Near the bottom, you'll find information for recompiling the rules and making it work with 99% of emulators. Simply click the image below or here to follow the step by step guide.

Read Adafruit's tutorial on configuring your custom arcade buttons to be recognized by the OS