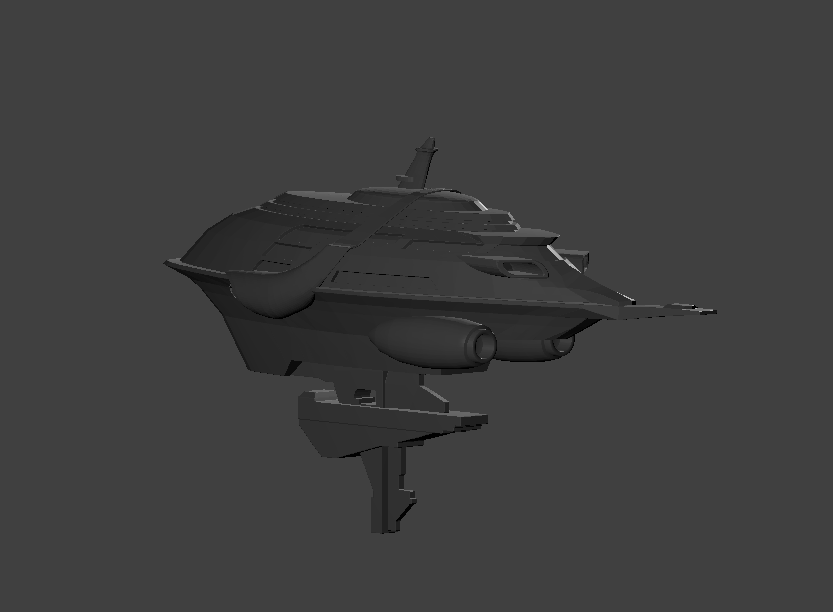
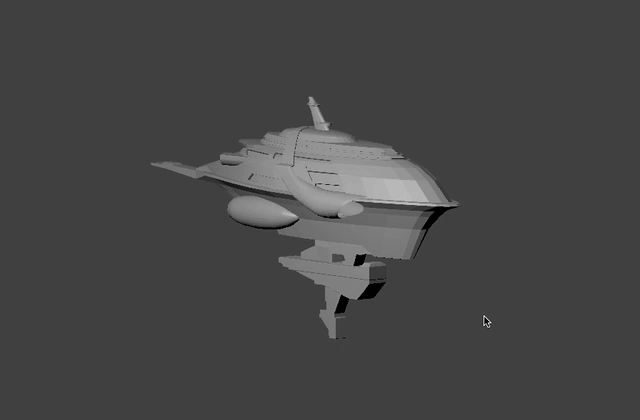
Mech Combat Mini

Download Alpha 1.5 :

Download, leave feedback in the comments below, and come back to try out the next version.


Multiple weapon types

version Alpha 1.4 brought damage and grenade indicators

version Alpha 1.4 brought damage and grenade indicators


Maps will be generated from Actual map data


Q: What is the purpose?

A: Make a small action mech combat game and have a playable version finished in one month

Q: How is it made?

A: Using Unity game engine and the kindness of like minded people.

Q: Can I help?

A: Absolutely! Simply sign up for the newsletter below, leave a comment with suggestions, and tell your friends about this. I'll be updating as frequently as I can.

Design Goals (WIP)

  • Engaging and satisfying mech combat
  • Generate maps from real world map data
  • Multiple weapon types
  • Local multiplier, stretch goal: asymmetric VR gameplay support

Q: Who is working on this?

A: Me, you, and our friends

Q: When is it done?

A: I've set a 1 month deadline to make the best game I can. The delivery date is April 7th, 2017.

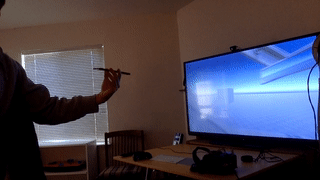
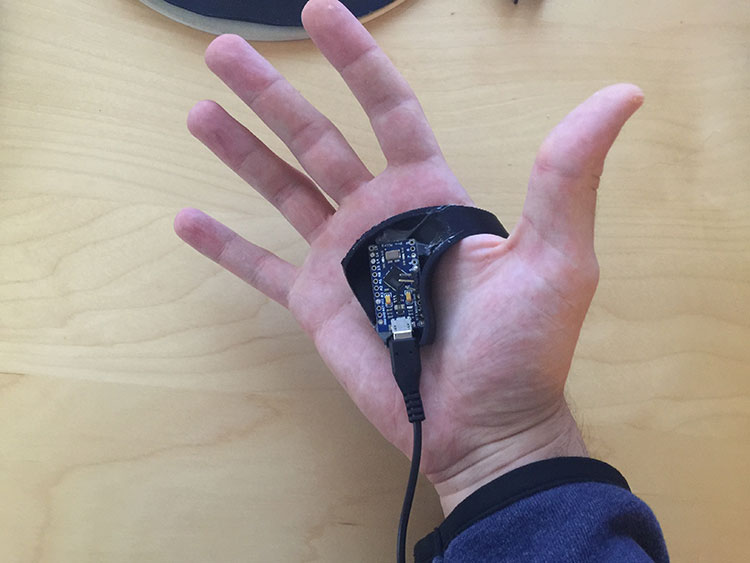
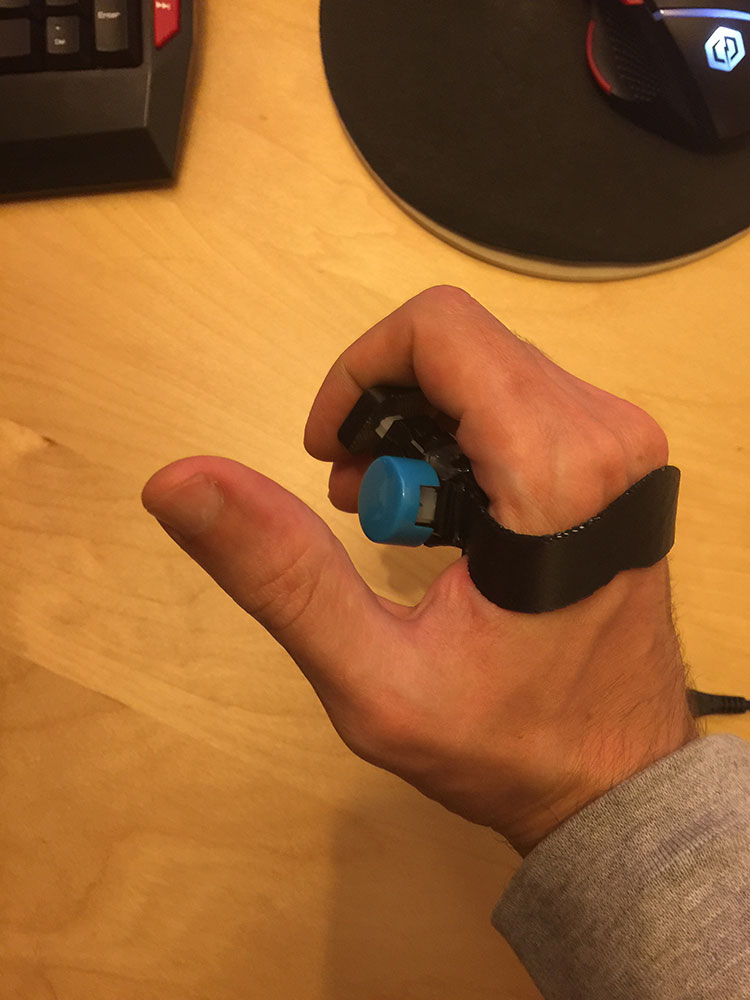
VR mech test using smartphone to reduce motion sickness. Click here for more info

Tests

Version History

  • v0.1.5 - Camera follows Player 1 (Player 2 still controllable with XBOX controller on Windows build)
  • v0.1.4 - Damage indicators, grenades
  • v0.1.3 - Moving AI enemies
  • v0.1.2 - AI enemies
  • v0.1.1 - Added FPS counter, 'm' to mute music, check for negative health
  • v0.1.0 - Initial release

VR Mech cockpit designed to reduce motion sickness

The Magic Edge simulator circa 1996

The Magic Edge simulator circa 1996

Piloting giant equipment from inside a cockpit, be it flying a jet fighter or a giant mech, is just plain cool. Magic Edge went bankrupt in the 90s but not before capturing the hearts of Silicon Valley nerds; my friends and I still talk of the physical cockpits fondly. However, implementing this in virtual reality is a challenging problem with the assumption that the virtual vehicles need to move around. Locomotion in VR conflicts with our natural senses. Moving inside a vehicle can trigger motion sickness if we don't feel our chairs moving along with what our eyes see. Thankfully our senses are a bit blurry and fallible. By reducing visual cues that imply virtual acceleration forces, coupled with an additional sensor that measures hip orientation, full VR locomotion is achieved with nothing more than a smartphone and office chair.

It should be noted that this blog post covers the design thoughts in the context of a walking robot and may not be the best solution for all situations. Also, if you're interested in implementing orientation data over Websockets in your own projects, I've uploaded an example project to get you started.


Fixed velocities + dampened impacts

 
"Acceleration (linear or angular, in any direction) conveyed visually but not to the vestibular organs constitutes a sensory conflict that can cause discomfort. An instantaneous burst of acceleration is more comfortable than an extended, gradual acceleration to the same movement velocity." - Oculus Best Practices: Simulator Sickness
 

One of the guidelines to reducing motion sickness can be paraphrased as only setting constant velocities. Unlike Nintendo's Super Mario that accelerates Mario the longer "forward" is held down, setting constant velocities removes the implication of an acceleration force. Since it would take infinite acceleration to change velocities in zero time, our brains kindly ignore the missing force ( see Newton's Second Law, force = mass x acceleration ). However moving in VR at various speeds can still be done using analogue control inputs. The XBOX controllers' triggers and joysticks work great to give discrete velocity values along the triggers' range of travel. As long as the user has a 1-to-1 expectation of their velocity, the motion sickness is greatly minimized. This control scheme works great for forward-back and strafing left-right but this isn't the full story in VR. Missing is what happens in a world with accelerations such as from gravity. Fast decelerations when collisions occur have associated forces our brains have learned to expect. Any acceleration unaccounted for is a cause for motion sickness.

Note: Even with 1-to-1 velocity control, if the user button mashes to create jerky motion for themselves, motion sickness can occur. Since I'm implementing slower moving robots, rate limiting the actions will solve this problem but keep this in mind for your implementation of 1-to-1 velocity controls.

The solution to the missing force in VR is found in games like Lucky's Tale that slowly move the players view without causing motion sickness. The camera ramps up slowly enough that it's plausible for our brains to not feel an acceleration force. The end result is a mostly imperceptible camera move. This along with healthy dose of attention redirection through gameplay, sights, and sounds works to mask the entire discomfort. After a couple of attempts, my best implementation results used Unity's Spring Joint to connect the camera and cockpit to each other but keep them as separate physics objects. The camera is not affected by gravity but has a large drag force to dampen the spring force from the cockpit pulling it along. The camera-spring motion is a good visual indicator of direction and scale of impact force for the VR player. I've have no evidence besides anecdotes and watching a couple people, but rubber-banding the player's camera on impacts is much better than not doing it.

A major part in this Mech simulator was that the user would "feel" the giant mech taking steps rather than just floating around. Syncing the footstep sound with visual motion cues is a really simple way to fool the brain to believe what it's seeing. My implementation of the step is simply shifting the collision box upwards and triggering the audio clip of a single step. After teleporting the collision box upward, gravity brings the cockpit to the ground smoothly. Finally, before the audio file finishes playing, the collision box transitions ("lerp" function in Unity)  back into place ready to for the next step. Thanks to the Spring Joint, the VR player's camera is isolated from the motion but it's still visible to convey the sense of motion. In the third animated GIF above, since the camera is locked to the cockpit, the animation makes it seem like the cockpit is not moving. However, from the camera's perspective, the cockpit is moving and the camera is slowly following. Notice how the passing cube is bouncing but in reality the cockpit is bouncing. This is due to the camera locked to the cockpit.

Using smartphone to track the head and hips seperately

With regards to things not to do to VR players, rolling the camera is probably the number one. I can't think of anything that more closely simulates a hangover. Closely followed by rolling the camera is rotating the camera left-right, also called yaw. This is problematic because we want to turn the mech to go where we want while still being able to look around the cockpit. In other words, our heads and bodies need to be tracked independently. I had plans to attach a rotary encoder to my office chair to always know where it's pointing, but then I realized my smartphone did this already.

Instead of requiring user input to control heading, the iPhone in my pocket reports to Unity its orientation and therefore the direction of my hips. This leaves the head free to look around while preserving any associated angular acceleration forces in view since the chair is actually rotating. The data is transmitted to Unity through a WebSocket connection served by an HTML page that accesses the iPhone's orientation API. No app installs needed, runs in default Safari web browser. A smoothed integration method is used to get fast response. For this initial application the smartphone's gyro drift error is ignored since the user is in VR and doesn't have any visual reference points to indicate drift error. This is the obvious next step for improvement by using a Kalman Filter or similar. 

Stationary visual reference point

The final requirement for a mech VR experience is separating what happens outside the cockpit from what happens inside. The brain needs a static visual cue to separate what it sees from what it feels. For example, flying in an airplane is quite disorienting when a plane banks to make a turn and the passengers on one side see nothing but sky and the other side of the plane sees only ground, yet we feel stuck to our seats. Which way is up? In order to avoid motion sickness we have to trick the brain into thinking it's not moving relative to the mech, even if the mech is moving relative to the world. Since the stationary objects in the brain's vision are not moving, and the brain isn't moving relative to the stationary objects, then that means the brain isn't moving either and therefore there are no forces to expect. This is accomplished with filling the player's view with static geometry representing the cockpit. The static cockpit grounds the brain into the local reference frame even if the mech is jumping or walking backwards. The tradeoff is visibility. If the player is fully enclosed, it's impossible to know if they're moving but then they can't see anything either.

Next steps

I have many ideas of details I'd like to implement such as vibrating and tilting the chair, changing the field-of-view dynamically, or adding surface details to the VR windows to feel enclosed and protected. Even adding a nose:

 
"Researchers claim the addition of the nose allowed people to play one of the games tested, a VR stroll around a Tuscan villa, for an average of 94.2 seconds LONGER than those without. " - www.express.co.uk/
 

Ergonomics of VR comfort may seem to be technical, but in practice have many overlaps in design aesthetics and subjectiveness. To make something feel good in VR it also has to also follow good design rules. The same rules of human manipulation and interaction apply to VR than to reality. I'm really looking forward to fusing disciplines with diverse minds and new perspectives, and exploring more possibilities of what VR/AR affords us.

Arduino Vive Controller Emulation

The goal: DIY VR hand controls that emulate the HTC Vive controllers. It's a continuation of the experiments done here.

The delay on the video is not present in the VR headset

Using the Leap Motion's hand position fused with an Arduino's orientation sensor data, a high accuracy VR manipulation device can be assembled. Previous experiments revealed that object manipulation with the Leap Motion could be improved by fusing the data from additional sensors. A BNO055 9-axis orientation sensor fills gaps where the hands are obscured. The result prevents jarring movements that break VR immersion and create strange conditions for physics engines. Moreover, the controller doesn't need to be gripped since it's U-shaped design clasps the hand. This leaves the users' hands free to type or gesture. Finally, tactile switches and joysticks provide consistent behavior when interacting with precision or reflex based tasks, such as FPS games. The current-gen VR controllers such as the HTC Vive, Oculus Touch, and Sony Move controllers all incorporate various buttons, triggers, and touch-pads to fill this role since gesture-only input methods lack consistency. This experiment is somewhere in the middle.

Right Hand

The right hand prototype came first. As minimal as possible and built fast to start testing as soon as possible. Naturally, a lot of hot glue. Three repurposed arcade buttons, a tiny PSP style joystick, and two SMD micro switches for the Menu and System buttons. 28AWG wire connects everything to an Arduino Pro Micro (sourced on eBay).


Left Hand: The Second Attempt

One of the pieces of feedback was to use the rotation type joystick so I used a replacement Gamecube joystick from a previous project to try it out. Great feedback!

Through changing the joystick, I also adjusted some dimensions by extending the joystick forward and trying a slightly different button configuration. A lot of improvements to be done here still. Check out the github page for the 3D printer STL files. I'm waiting on a large lot of SMD micro switches to arrive to add the menu and system buttons. The smaller buttons will also let me shrink the design even further.

System Architecture


The Math

The problem we're trying to solve is split up into two goals:

  • Position (x,y,z) controller using the Leap Motion's hand position data - a function of the headset position and orientation because the Leap Motion sensor is mounted to the headset
  • Orient (yaw, pitch, roll) controller using Arduino/orientation sensor - using absolute orientation from the 9axis BNO055 sensor

Linear Algebra, more specifically 4x4 matrix 3D transformations often used in computer graphics, is practically magic. Take the input from Leap sensor SDK and convert it to a value the Razer Hydra driver understands, while preserving translations, rotations, and offsets along the way.

Most of what's happening is summed up by the steps below, and the math source image on the right. I couldn't find a way to import NumPy to FreePIE, all the matrix math was rewritten in pure Python. Here's what the FreePIE script does:

  • Wait for 'recenter' event, then store current headset position and orientation
  • Continuously calculate how much the headset has translated and rotated since 'recenter' event
  • Transform Leap hand data into the headset coordinate space
  • Continue transform of Leap hands into calibrated (i.e. 'recenter' event) space
  • Continue transform of Leap hand positions into Hydra space (compensating for offsets from calibration step throughout the steps above because of driver behavior*)
  • Set Hydra position values from transformed Leap data

*The Hydra controllers seem to offset their calibration state of 0,0,0 so I had to guess the y and z values. Not understanding where the magic number was coming from fooled me for a long time. Moreover, if on recenter event the controllers aren't facing the base station, you could end up with the mirrored expected rotation behavior.

Optimizations in the code were left for another day. I tried to be obtuse as possible since I wasn't familiar with the subject matter. This ended up being a good idea because I'm not sure how I could have discovered the undocumented calibration behavior by the Steam VR Hydra driver.

The take away being: find the simplest test you can verify your assumptions with. Even if it's just a thought experiment, 90% of the time a problem is an incorrect assumption that can be revealed by a simple question.

As an added complication, until a new Leap driver is written, FreePIE only has access to the restricted values of the normalized interaction box volume rather than the full field of view. If you look closely at the video you can see the controller 'confined' to an invisible box. This isn't latency, it's the values clipping.

To simplify, the Arduino sends the orientation sensor data by assigning quaternions to four 16-bit axis: x,y,rx,ry. The thumbstick uses the 8-bit z and rz axis


Orienting the hands

First test calibrating, positioning, and orienting controller

Orienting the hands is done by a 9-axis BNO055 sensor, which returns absolute orientation relative to Earth's magnetic field. Instead of a serial connection to the computer, the orientation data is passed along as generic USB HID joystick values by the Arduino. In this way, there are no drivers to install and it's standards compliant on everything with a USB port (e.g. consoles). On the computer, the FreePIE script does the following:

  • Read 16bit joystick values (x, y, rx, ry)
  • Convert them back into orientation data (Quaternion)
  • Convert to Euler angles (pitch, yaw, roll)
  • Apply orientation relative to 'recenter' event from calibration

Joystick and Buttons

Mapping the joystick and buttons using USB HID library by NicoHood was straightforward. As a minor side-effect: the 16-bit axis registers are taken by the orientation data, which leaves only two 8-bit registers for the joystick x-y ... I'm not too concerned (right now).


Next steps

I tried a few free Steam VR games/demos. There were a few glitches very specific to developer implementation, but overall very satisfying to finally have access to all the Steam VR stuff. The Steam VR tutorial worked flawlessly. Additionally, the Steam VR UI and controlling the desktop PC while in VR is very satisfying. 


However, passing the data over the joystick axis caused the UI to sometimes try to go left-right, and the trigger button didn't work in Rec Room. There was a Rec Room bug fix for the Razer Hydra's trigger button, which seems suspiciously to be the culprit that ignores the FreePIE's emulation of the Hydra's trigger. This resource was also useful in setting expectations of the system http://talesfromtherift.com/play-vive-vr-room-scale-games-with-the-oculus-rift-razer-hydra-motion-controllers/

Long story short, it's best to create a custom experience in Unity directly for the controller right now, while open standards are still being worked out. Each app has quirks for each motion controller to make it compatible with their specific code. A custom experience would best leverage both worlds: finger tracking + precise interaction.

A John Carmack tweet:

 
"While the fuzzy notion of a cyberspace of data visualized in 3D is unlikely in a general sense, specialized visualization of data sets that \ \ you can "hold in your hand" and poke at with your other hand while moving your head around should be a really strong improvement."
 

Having access to some of the VR experiences that require motion controllers is spectacular. I hope these source files help some of you progress towards an open VR landscape, where everyone is on an equal playing field. While waiting for these standards, I'm going to keep working on the ergonomics and controls while conceiving of data sets in VR to visualize. Share your ideas in the comments below.


Externally mounted graphics card

The Pre-built PC I bought on sale only has 2 PCI express slots and the graphics card takes up two. I needed a USB 3 expansion card so decided to move the graphics card with a PCI express riser extension (this is the 9cm, I can't find the 25cm I used here).

The card is held in place with four 3D printed corner mounts that are screwed into several layers of glued MDF. The MDF is bolted to the case's original side panel. The tinted window has been removed. I was lucky the power cable reached.


Wireless VR Glove: Minimalist Controller


In the 2013 adaptation of Ender's Game, Harrison Ford's character slips a metallic device over his hand to control gravity in the training room. This scene inspired me as I've been trying to imagine VR controllers that can be used alongside mouse+keyboards. The controller used by Ford seemed convenient to put on, offer a lot of finger freedom, and probably allow for throwing VR objects without falling off. The design also immediately made me think of the eventual conclusion of the Valve controller prototypes...


Initial thoughts

The first 3D test prints work for me since I used my own hand measurements, but it should be simple enough to change and reprint for more hand shapes. This is only a mockup, but placing the battery and electronics will be split between the palm and knuckles.

This "hand-clamp" shape is much easier to put-on than the Fitbit bracelet I previously built. I still plan to use rings or thumb buttons, so this shortens the wires too. Plus, it doesn't get in the way when using a keyboard or a mouse. Everything so far seems really promising.

I'm looking forward to cramming a wifi chip and battery inside :D


Proof of concept

I decided to simplify the requirement list while still figuring out what exactly this controller does. I'm shelving adding wireless functionality in favor of spending more time with the ergonomics. An Arduino Pro Micro fits with the USB cable neatly out of the way. Furthermore, the Leap calibration doesn't seem too bothered by the 3D printed parts, which appear white in IR light.


Arcade buttons were taken apart and hot-glued together. Feels ok and can still use keyboard with controller on, but not comfortably yet. The trigger button is too far forward. It's a delicate balance between being a comfortable button and getting in the way of typing on the keyboard.


First working prototype

The Leap motion does a really good job when it can see the hand, but certain gestures that occlude the hand cause jitter and tracking loss. Moreover, titling a fist away from your face (like aiming a pistol up and down) is nearly invisible to the Leap's infrared cameras. A bno055 sensor provides rotational data while  the Leap Motion does positional tracking:

I've been watching a lot of Westworld lately, so making a cowboy inspired demo was most motivating. The wild west revolver asset is free from the Unity store, and it's ultra bad-ass to hold. I can't wait to animate it with the buttons. With this combination of video positioning and sensor orientation, the tracking is really good. It's too late in the evening to solve the lower than normal fps (75-85), but I'm sure the cryptic warning being spit out by the serial communication code is to blame. Once we're back at 90fps the objects should rotate in sync with leap hands.


Optimizing frame rate

I didn't find one optimization that brought the frame rate to a constant 90fps, but several together seemed to do the trick. The one I spent the most time on was installing a USB 3 expansion card. My motherboard only has 2 PCI express slots and the graphics card takes two, so I mounted the graphics card outside to make room. Four unique 3D printed parts fasten the graphics card to glued layers of MDF wood that act like spacers. The MDF is bolted to the case's original side panels. I'm optimistic about the temperatures. More photos about the build here

Ultimately, this didn't seem to make much of a difference. The original thought was the Leap Motion + DK2 running over USB 2 was a bottleneck, but switching to USB 3 didn't offer a big boost. However, at least now the Oculus software no longer says my system is not supported.

I rewrote the Arduino firmware code cleanly and minimally, stripping out the code that waits for a 2 byte request before sending out the orientation data. Instead the Arduino sends at steady 60fps and the Unity serial port uses the latest data and tweens in between (there were race conditions and timeout errors when trying to send the data at 90fps).

Unity runs the serial port in a separate thread that waits for updates at a consistent sample rate. This works fantastic to produce very smooth orientation of an object in space while in VR, since the render thread isn't blocked by the serial port waiting for data. I'm surprised that 60Hz sampling rate produces such good results since I thought VR required 90fps; I guess only the displays need data at 90fps. However, that proved to still not produce perfect motion because while the orientation was silky smooth, moving the object's position caused sharp ghosting effects. Stranger still this was the positional data came from the Leap Motion, which is rendering the hands much smoother.

The final solution was changing the textures to use lower contrast colors. Turns out the low-persistence displays in the Oculus DK2 suffer a side-effect that's made much worse by high contrast colors.

The demo now runs at a satisfying 90-95fps:


Conclusions

  • Much improved object manipulation by fusing button sensors, orientation, and Leap Motion data (while preserving finger tracking)
  • With infinite funds, the obvious next step would be implementing Valve's Steam VR Tracking for incrementally better solution
  • Cost and setup of a Lighthouse solution isn't always practical, so it's good to know adequate tracking can be done with mounted cameras and IMUs
  • Although finger tracking evokes good VR presence, the inconsistent nature of gesture recognition makes it a compromise for holding a positional tracker with accurate triggers/buttons

Depth Perception with Two USB Cameras Mounted to Headset

Two Logitech C210 Cameras mounted below Leap Motion on an Oculus Dk2 VR Headset

Two Logitech C210 Cameras mounted below Leap Motion on an Oculus Dk2 VR Headset

Being productive requires some basis in reality, meaning having knowledge of what's going on around you. Knowing where real objects are relative to the virtual world becomes important after inadvertently clearing your desk for the second time while flailing about in VR. Simple tasks like finding objects after putting on the headset become an awkward dance in VR. I think this is why Apple and Microsoft are selling us on the augmented reality devices rather than fully enclosed virtual reality headsets. Augmented reality allows the user to be in the real world by projecting onto a transparent surface rather than obscuring the user's vision with a display. It maintains productivity by supplementing our vision rather than replacing it, even though the display technology has a lot less pixels. Today's augmented reality headsets have smaller field-of-views, lower resolutions, and inferior image contrast/brightness relative to virtual reality headsets on the market. This post documents using a pair of inexpensive webcams to give sight to a VR headset user, and preserve the larger resolution.

The initial motivation was being able to use a keyboard in virtual reality by finding it on my desk quickly. This was tested with a single USB webcam hot-glued to the top of an Oculus DK2. To represent the webcam feed virtually, a plane was set in front of the user at an arms length, about 1ft [30cm] wide, and with the its texture set as the webcam.


Although it worked, the lack of depth perception and became a hassle very quickly since distance was constantly misjudged. The feedback of the live video feed allowed the task to be eventually completed, but depth perception became the obvious next step. Interestingly, no one noticed the camera not being in front of their eyes until they tried to cover their “eyes.”

Realizing that depth perception is a large and under appreciated part of being human, two cameras became the focus of the second test. Two Logitech C210 webcams were used because they’re inexpensive and already in my junk box. The plastic housings where removed and replaced with custom 3D printed mounts. Since a Leap Motion is already mounted to the headset using a 3D printed ABS mount, the camera mounts were fused to it with acetone. In software, the webcam plane was duplicated for the second webcam, but each plane only rendered for their corresponding eye in order to produce the illusion of perspective. After shifting one of the planes slightly down to compensate for the alignment, the brain immediately began to see in “3D” with the FOV and quality of a webcam. Depth was still difficult until some trial and error of scaling and placing the planes at different distances from the viewer. Using the hand as a measurement, scaling the values intuitively eventually led to a near perfect 1-to-1 match of hand size as the brain expects it. Picking up and interacting with objects became intuitive again; the brain permitted this new view of the world.


From here the next steps would be adding fish eye lenses to increase field of view. The camera’s limited view felt like looking down a telescope and required moving the head a lot. The resolution was good enough to write with pen and paper, but the auto-exposure feature was too slow and inaccurate. If anything, this experiment has made me really appreciate the specifications of the human eye. Here's a slide I taken from Oculus Connect 3 Keynote about the future of VR:

3D Printed Spaceships

Printed in ABS plastic on Up! Plus. Some space ships were downloaded and optimized for 3D printing, most were scratch made in Soliworks or Blender


Axiom from Wall-E download STL


Altares from Space:1999


Superswift from Space:1999


Swift from Space:1999


Ebon Hawk from Star Wars: Knights of the Old Republic


Red Dwarf from Red Dwarf


Tie Fighter from Star Wars


Untitled Space Plane from Kerbal Space Program


SDF-3 from Robotech


Type S Scout from Freelancer


Voyager from Star Trek


Tokugawa Retrofit from Robotech


Tokugawa from Robotech


Tristar, Banshee, and Battleclass from Robotech


Variety from Kerbal Space Program and Firefly

Precise Pinch Hand Tracking in Virtual Reality

When mounted to the front of a VR headset such as the Oculus DK2, the Leap Motion provides good enough hand and finger tracking to maintain immersion. However, the pinch-gesture requires user to be obtuse in order for the camera to recognize the hand clearly, which makes interacting with 3D objects frustrating. To improve this a mechanical switch mounted in a 3D printed ring provides a near 100% reliable input device. It's better suited for interacting with virtual objects consistently, while maintaining full hand and finger presence.


The end goal is browsing the web in Virtual Reality and the keyboard/mouse is required to do this. A ring doesn't get in the way when typing.

This is the first test of interacting with web "panels" by pointing and "clicking" with the ring device, and doing text input with a keyboard.

The best user interface device is our hand, adaptable and precise with no learning curve. Having to pick-up a controller just for interacting in the virtual world breaks immersion, while wearing a glove gets sweaty fast. Furthermore, my intent is to integrate keyboard/mouse into my virtual reality apps and wearing a glove when typing isn't the best. This is how I ended up on a ring with a mechanical button embedded inside. The first iteration (blue as seen below) was as simple as possible, and the second iteration aimed for as small as possible with the tools available to me.

For now the device is connected to the computer with a long USB cable. An Arduino flashed as a USB HID device enumerates to the computer as a joystick device and detects the button press. Ideally the entire device would be just a wireless ring, but I only have an ESP8266 wifi board on hand and the power draw would require a large battery anyway. It was fastest to build a wired version since I wasn't sure about the idea yet.

The mechanical button was pulled from a broken optical mouse. The wrist mount is a Fitbit band with a hole pierced through it. A 3D printed plug replaces the internal electronics and adds a mounting post for the Arduino case (also 3D printed). Thin gauge wires are used to connect the mechanical switch inside the ring to the wrist mounted Arduino, with globs of hot glue as wire strain relief. Moving the ring from one finger to the next is convenient for testing.

The most comfortable finger to press on was the middle finger as my thumb needs to stretch the least to reach it. This poses minimally annoying issues when the hand tracking becomes confused and the virtual hand glitches out. The Leap Motion has trouble tracking the fist-like shape of the thumb pressing on the middle finger, as compared to it more easily recognizing the pinch gesture.  The best hand tracking occurred when the ring-button was on the thumb, which allows for fast and precise enough control, as seen in the video. Pinching your fingers around virtual objects feels the most intuitive when grabbing virtual objects, so this lesson inspired the following open-ring design. 

Along with making it all wireless I'm excited to experiment with using the button on the forefinger and being able to press on real world objects. Being able to switch input devices and making it all modular also seems obvious to pursue. Maybe magnetic quick disconnect connectors...

Exploration Boat


Inspiration


Pontoon Assembly


Resin Coating


Electronics